You can create groups of students. Groups are used to easily filter lists and reports, create assignments for select students, and more. Students cannot see the groups in which they've been placed.
To create a new group:
-
From your educator account, click Students and select Student groups.
 Click to enlarge
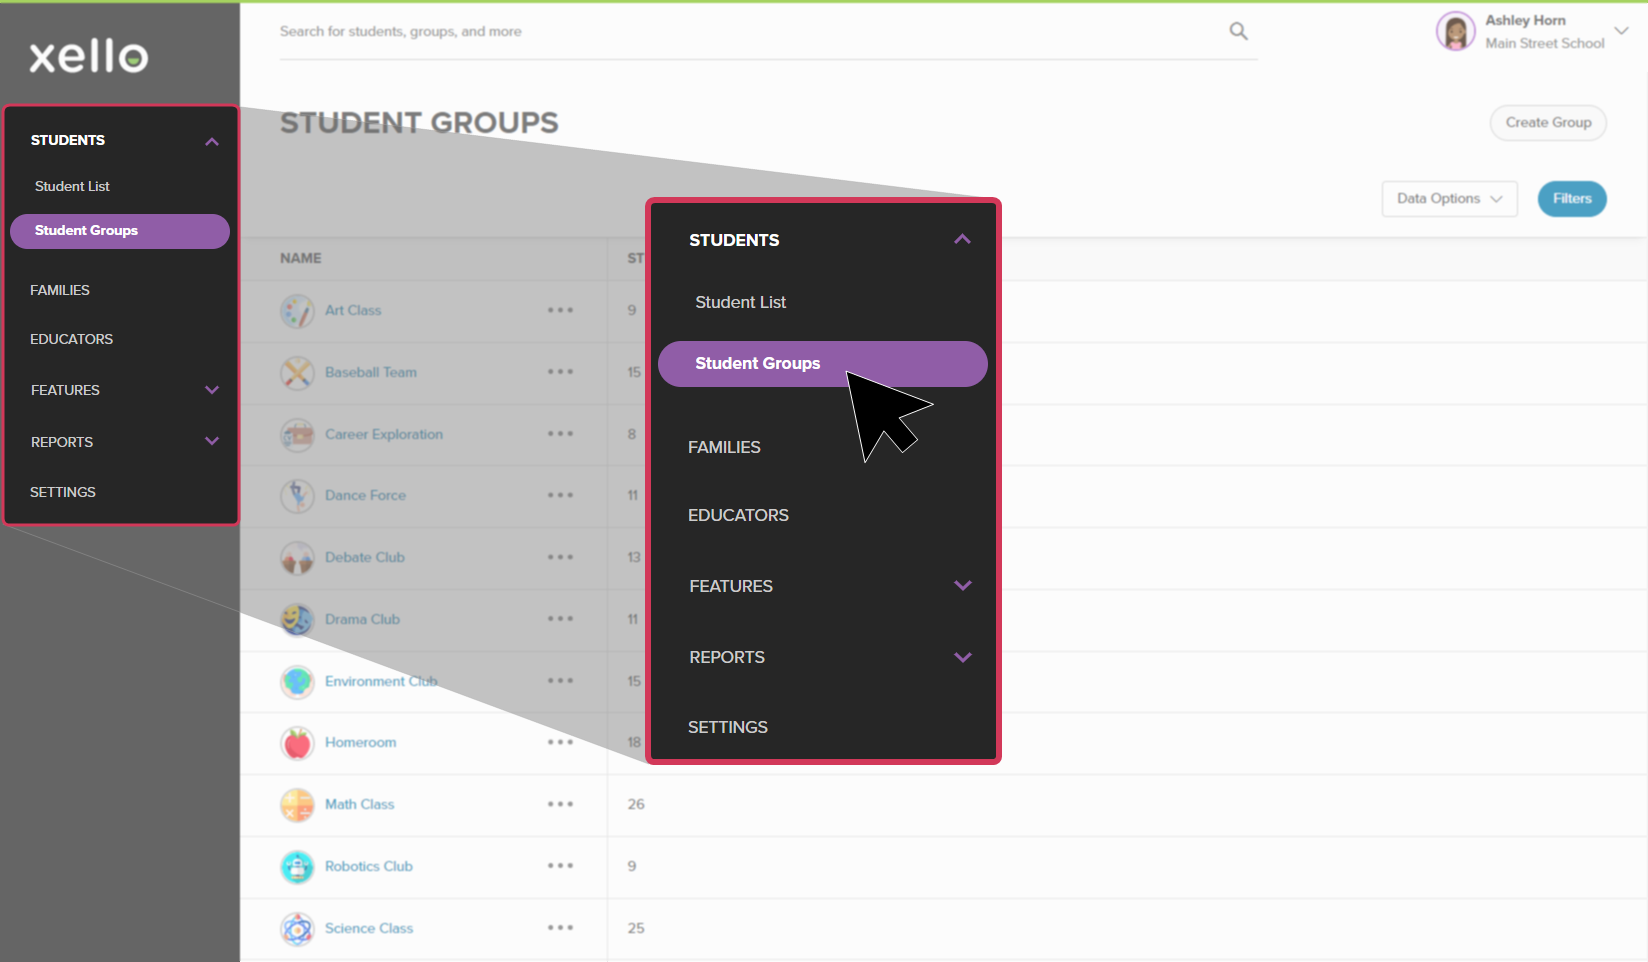
-
From the top right corner, click Create Group.
 Click to enlarge
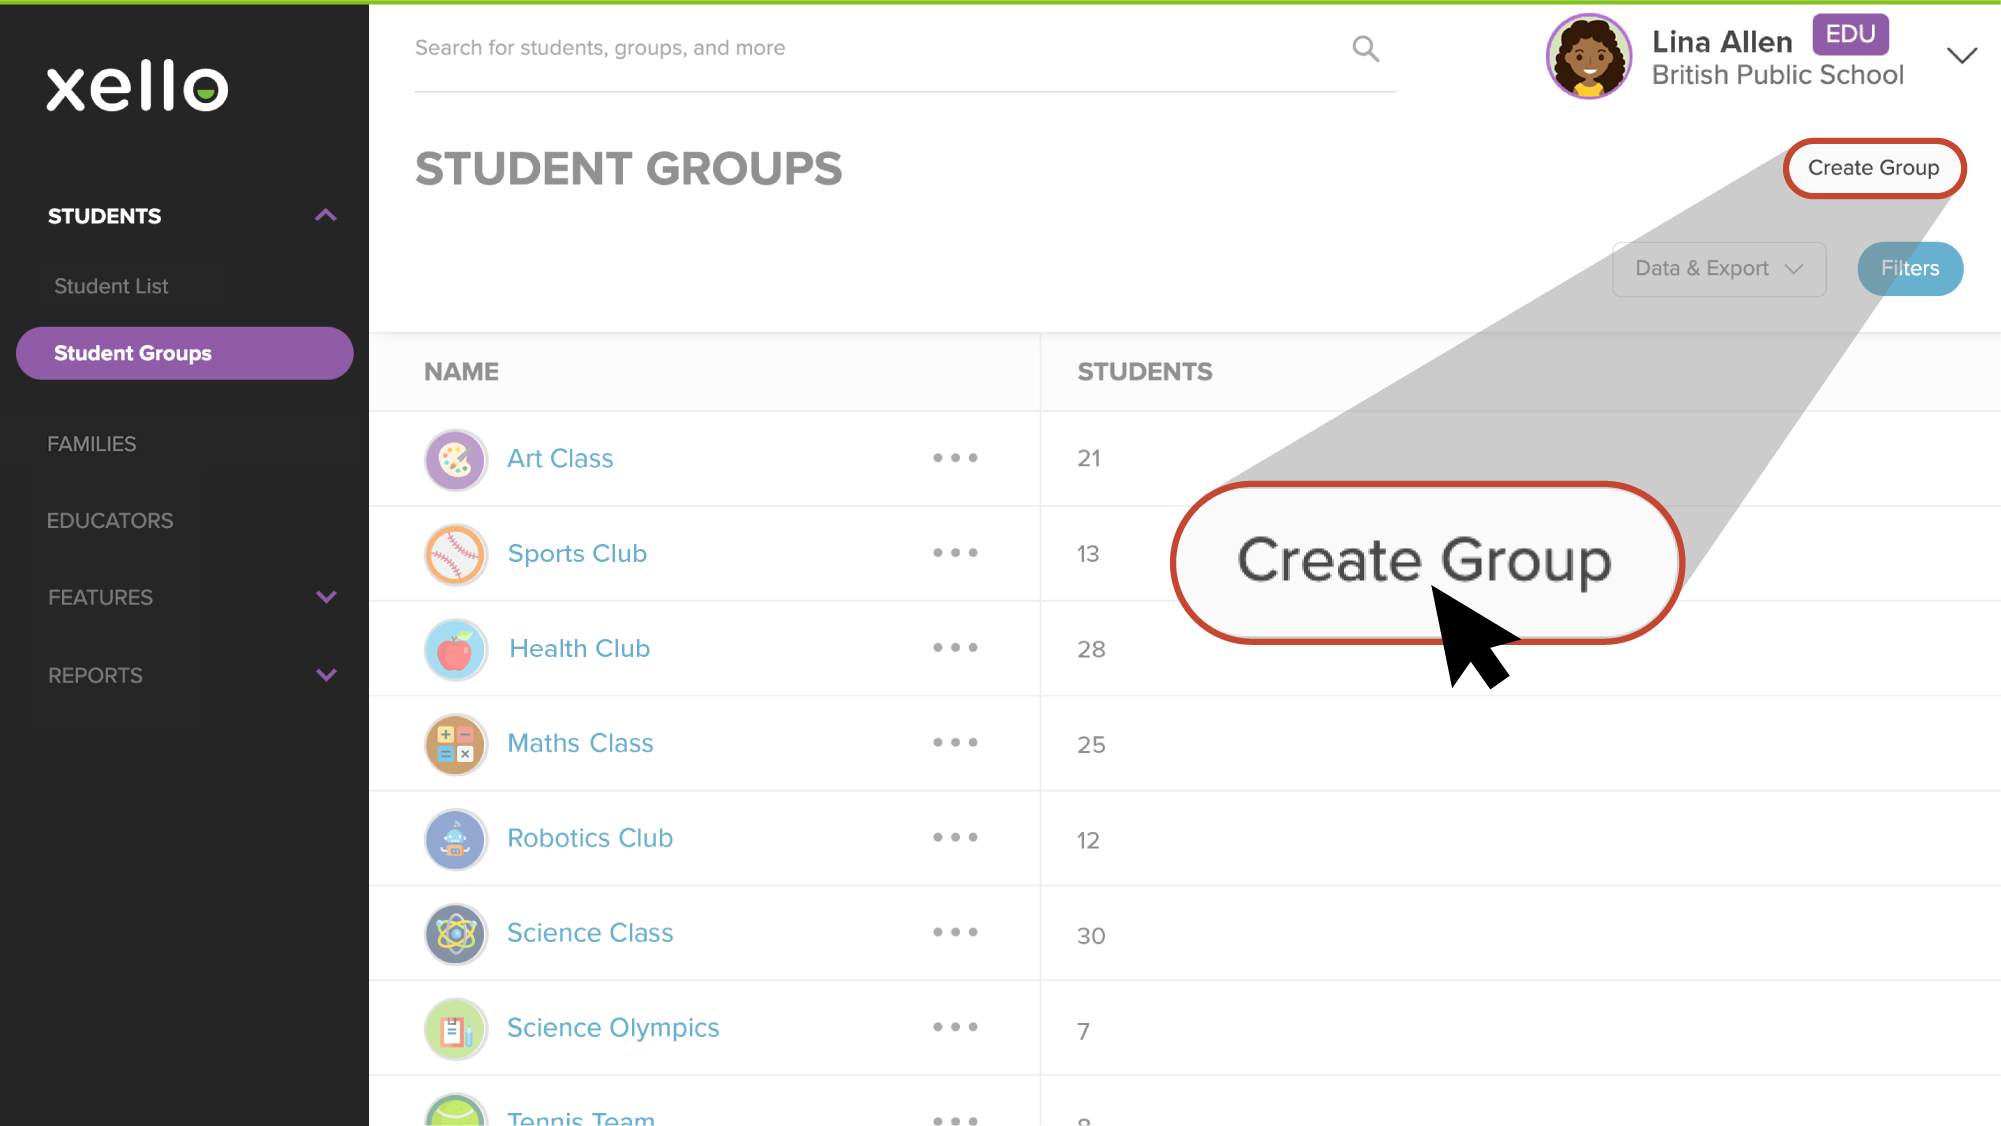
- Give the group a name. To add students, either search by student name or ID, or click Select Students to browse and select your choices through the student list.
 Tip: From the Select Students page, clickFilters to easily narrow the student list by year or show only your students.
Change a group name
Group names can be changed after the group has been created.
To change a group name:
- From the list of Student groups, click the name of the group you wish to change.
- From the top right corner of the page, click Edit.
- Change the group name and click Save.